Installation on a Computer Network
Steps for Installation of CivilCAD on a Computer Network. Install CivilCAD on one computer within the network (a local workstation). Download the setup file, double-click it, and follow the installat…

Updated
by Yael Zitvar
Steps for Installation of CivilCAD on a Computer Network
- Install CivilCAD on one computer within the network (a local workstation). Download the setup file, double-click it, and follow the installation wizard. For additional guidance, refer to the CivilCAD Installation Guide - CivilCAD User Manual.
- Create a shared folder on the server that will be accessible to all computers where CivilCAD will be installed.
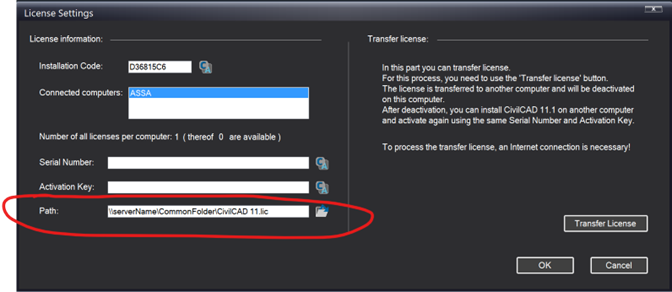
- Copy the file CivilCAD 11.lic located in: …Documents\CivilCAD 11, from the local computer into the shared folder created on the server.
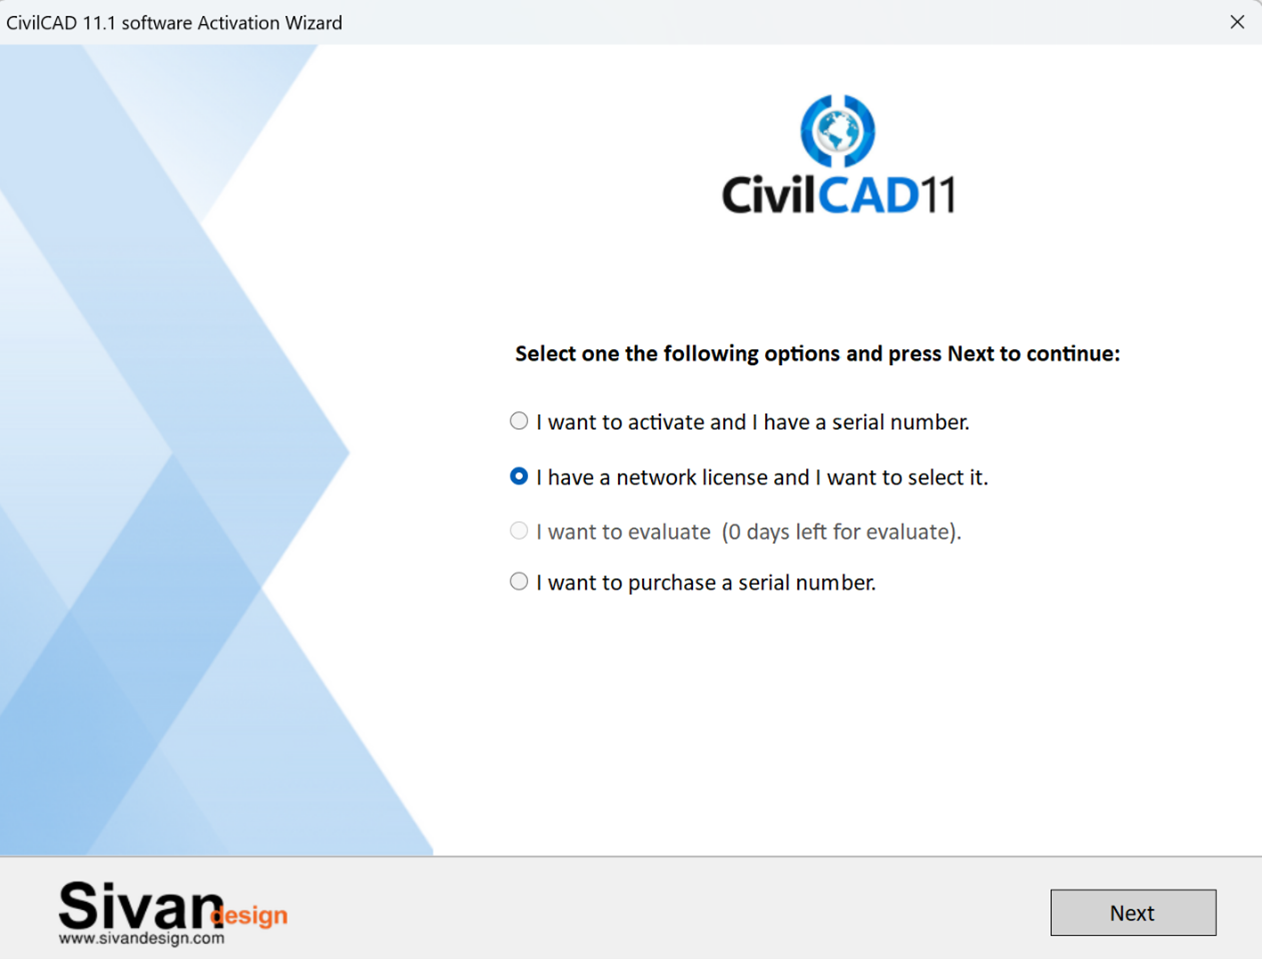
- Launch CivilCAD on the local computer. An Activation Wizard window should pop-up.
- Select “I have a network license and I want to select it” and Next, in the Activation Wizard.
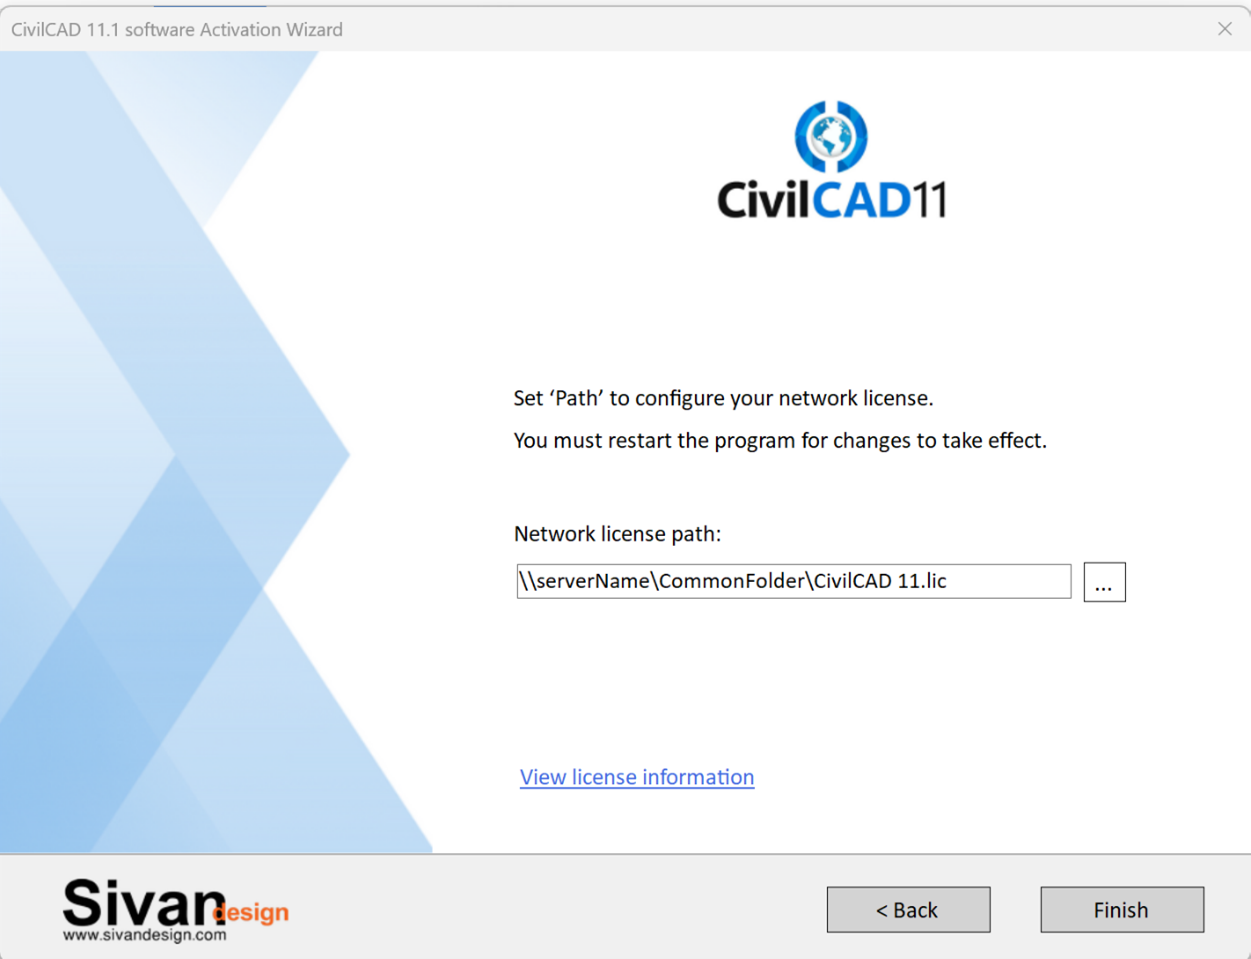
- Click Browse and specify the full UNC network path to the CivilCAD 11.lic file copied in Step 3. The path must be an absolute network path (do not use mapped drives).
- Click the “View License Information” link and wait for the following page to appear (This can take from 5 seconds to 5 minutes).
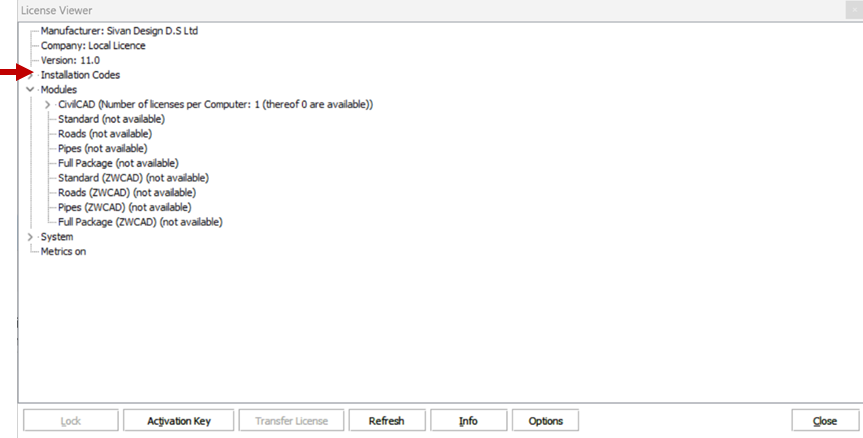
- Open the "Installation code" list and copy the value of "Code 05".
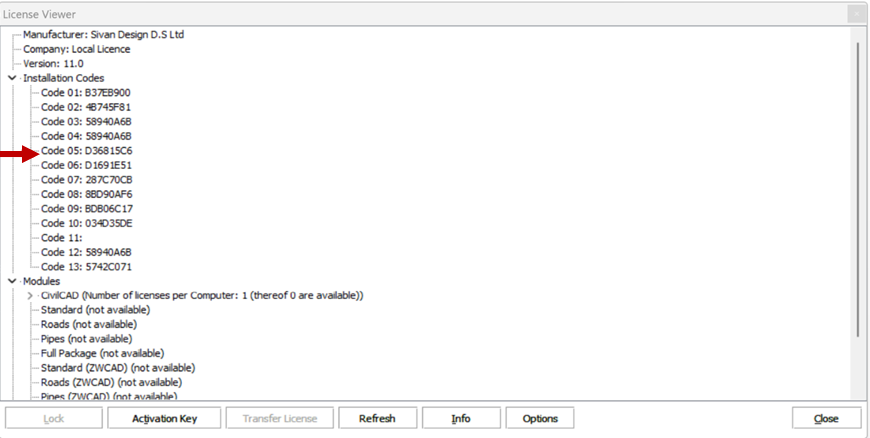
- Send the Code to your software vendor for the generation of a network license file.
……………… - Upon receiving a new license file (CivilCAD 11.lic), copy it to the network folder created in step 2. Overwrite the existing file in that folder.
- Launch CivilCAD and verify the installation.
- Go to File -> License Settings, to view the network license path, and use this same path for all subsequent CivilCAD installations on the network.
How Did We Do?
CivilCAD Installation Guide
General Settings